

5 Steps for Starting Seeds Indoors
Starting seeds indoors ahead of the summer gardening season is extremely beneficial for many types of plants and flowers. Giving the plants a head start to grow and produce seedlings that can be transplanted in your garden when the last frost has passed and the temperatures have risen is really the only way to go for certain plants (like tomatoes) if you're going to start them from seed.
It's perfectly acceptable to let someone else do this work and buy plants to transplant into your garden. In fact, it's a great way to get your feet wet in gardening, particularly if you're a beginner. It tends to be more economical to buy seeds than plants, but it's also more work. I do a combination of both.
Some plants do not need to be started indoors, like beans, carrots, and peas, among others. Those do best by directly sowing the seeds in the garden when it's warm enough.
How do you know whether to plant indoors or out? Thankfully, seed packets provide instructions and recommendations. Read the packet and you'll be good to go!
What You'll Need For Indoor Seed Starting
Seeds (I know...obvious, but needs a mention)
Planting containers
Seed-starting mix (mix yourself or buy pre-mixed)
Pencil
Heat source (seedling heat mats)
Light (for at least 15-18 hours per day) -- Grow Lights are ideal
Surge protector(s) (depends on the number of lights/mats you'll need to plug in)
Timer (for electrical outlets)
Sharpie
Masking tape
5-Steps for Starting Seeds Indoors
I actually have quite a few seeds to plant this year, but I only started the first pass yesterday with seeds that should be planted between 5 - 10 weeks ahead of transplanting. Our last predicted frost date in my area of New Jersey is April 30. The way the weather has been this year though, I wonder if we won't see frost for weeks ahead of that. I likely won't transplant anything until late April/early May.
Use my handy Garden Tracker Spreadsheet to keep track of everything for the season!
My first seed starts included seven varieties of tomatoes, a few herbs, two types of eggplant, celeriac, and beets. (And I'm not done!)
1. Assemble grow lights

Seedlings need 15-18 hours of light per day. Even though the days are getting longer, I still see mostly darkness in February. So, it's not enough to just put the seedlings by a window and hope for the best. I learned my lesson during my first gardening season that I do not have enough light and ended up with spindly seedlings. It was discouraging, but was an important lesson. Now, I use grow lights exclusively for starting seeds indoors.
In my second year of gardening, someone gave me an old grow light system to get started with. It worked, but...I'm pretty sure it was a major fire hazard, so I got rid of it after a couple of seasons and replaced it with one of these stackable units. I think this is a great system because you can try one level (which fits about 72 cells of seedlings) and can add on if you want to expand. I also got lucky and found a local person who was putting a 3-level grow light system out in the bulk trash! I quickly arranged for that to come home with me. It fits six 72-cell trays!!! I'm using that for the first time this year.
2. Lay your heat mats in place
Place the seedling heat mats in their place and position the cord in a way you'll be able to plug them in and won't end up pouring water all over them. (We make a lot of sacrifices to grow things, but getting electrocuted shouldn't be one of them.)
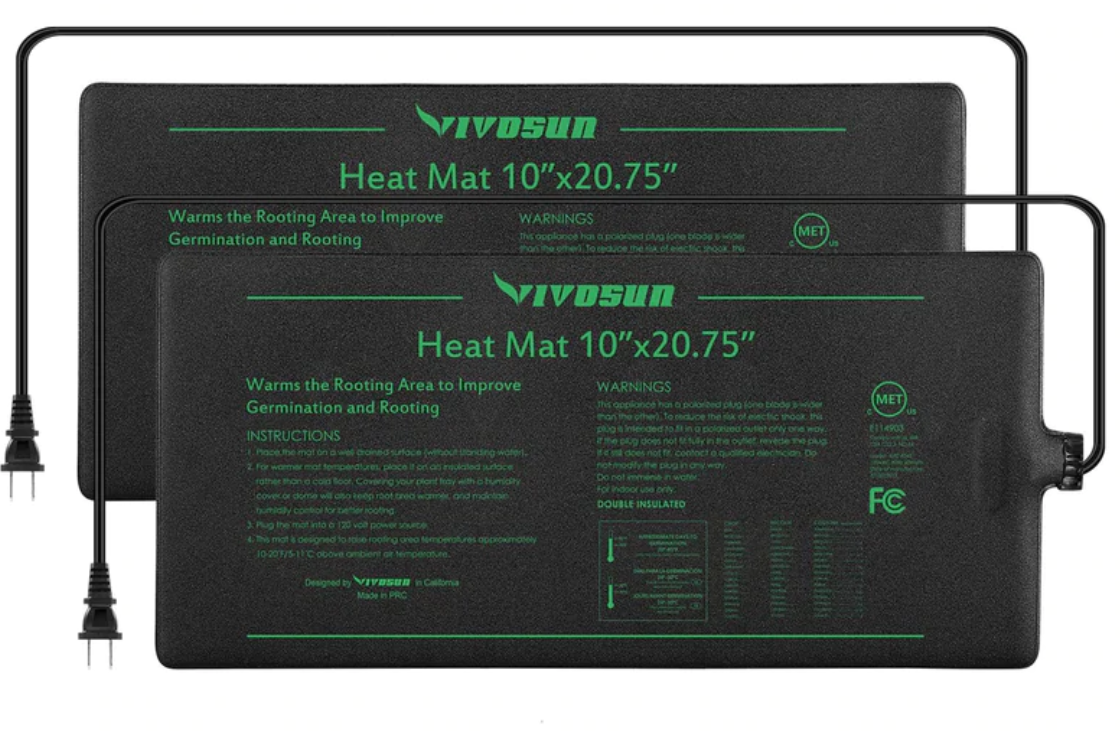
Should you buy heat mats? Seedlings need warmth. Few plants germinate at sustained temperatures below 40° F. or above 104° F. You can't stick them in a really cold basement and expect them to thrive. I used seedling heat mats to keep them warm. They can stay on constantly and will provide a warm, low, steady heat to your seedlings. They're reusable each year as well.
3. Prep the containers
Fill the container cells with seed starting mix. Then add water to the soil and the tray they are placed in. You want to make sure the soil is moist before planting any seeds. Place the trays on the heat mats.
Which containers are best? I've started seeds in a few different ways. Most common for me are the self-watering systems like this one, from Burpee. The watering happens from underneath, drawing the water up through the bottom of each cell and it has a dome that keeps the moisture in. Here's what I HATE about these things - the soil pellets. I bought these thinking, "What could be easier?" I'll tell you what's easier - Performing Root Canal. On yourself.

The problem with these soil pellets is that they don't all expand well, or at all, or evenly. So, you sit there like an idiot, pouring water all over these things continuously until the tray overflows and they just bob in the water without expanding or breaking apart to give you the loose soil you need. Then, you'll try to break them apart with your hands, only to throw half of them across the yard in frustration. Sorry, Burpee, I love ya, but these things just don't cut it.

Pre-mixed seed-starting mix
My recommendation - Honestly, you could easily just use Dixie cups with a hole poked in the bottom of them. Unfortunately, the systems I have been using are fairly pricey compared to Dixie cups, but I think there are advantages to the moisture dome and the way the watering comes up through the bottom without overwatering, so I do like them (I'd just skip the pellets). There are also Peat Pots, which may be worth looking into. They can be used and planted directly in the soil, making it easy to transplant, but I've read that it may be more difficult to control the elements (water/mold). I'm sure that many have great success with them though.
As far as soil, you can buy pre-made ones or mix your own batch.
4. Plant & label seeds

Use a pencil for clean planting holes
Here's where the pencil comes in. Make a nice hole for depositing seeds by poking the eraser end of a pencil into each cell. Don't go too deep - pay attention to the instructions on your seed packet for recommended depth.
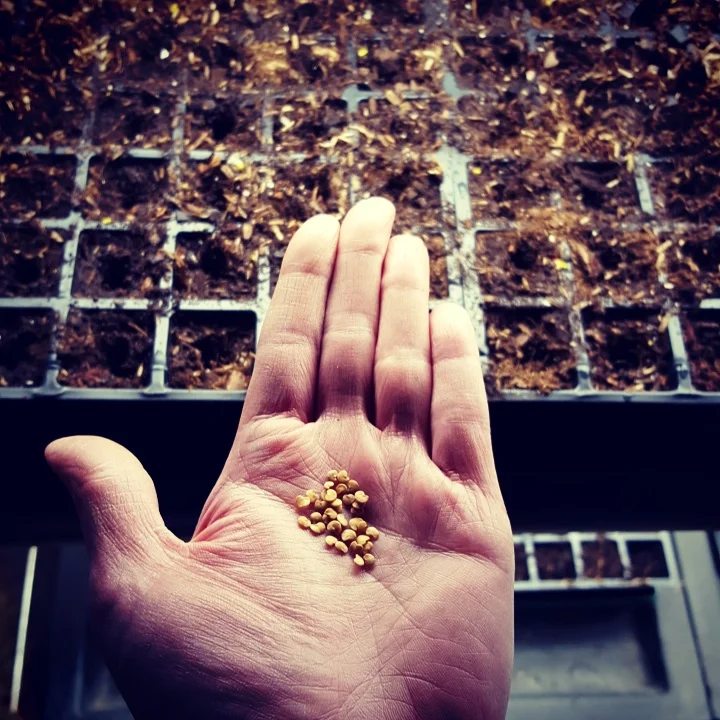
Put 1-2 seeds in each hole. If you end up with all seeds growing successfully, great - you can either thin them out or transplant extra plants to another pot once they get a little bigger.
COVER THE HOLE AS SOON AS YOU PLACE THE SEEDS IN IT! I'm stressing this point because I can't tell you the number of times when I put seeds in, then looked down at my hand to get another couple of seeds, and when I looked back, I thought, "Where did I leave off?" Plant & Cover, Plant & Cover, Plant & Cover. Trust me.
Where to buy seeds? There are many different sources for seeds, and some are best for different regions. (I'm in zone 7a). I tend to buy seeds from Territorial Seed Company, Johnny Seeds and Burpee. I find they provide great information in their catalogs to help make good decisions, and have had excellent quality and variety. Packets typically contain about 15-40 seeds (and sometimes 250 when they're really small) and can range anywhere from $1.25 to $5.00-ish. So, you can see why growing from seed v. a purchased plant can be economical. However, sometimes you don't need that many and only intend to grow a few plants of something, so you may be better off sometimes buying the plant.
Pay attention to the number of weeks before transplanting is recommended for each seed! Some are 8-10 weeks before transplanting and others are only 2-3 weeks. Don't just plant everything all at once without looking at the recommendations on the seed packet!
Label the plantings! I just use masking tape and a sharpie. I indicate the name, how many rows I used for each seed type, and the date. DO NOT label the water tray. The seed trays can get moved around and you could put them back next to the wrong label. Label the actual seed trays.

Simple labels at the time of planting can alleviate confusion later
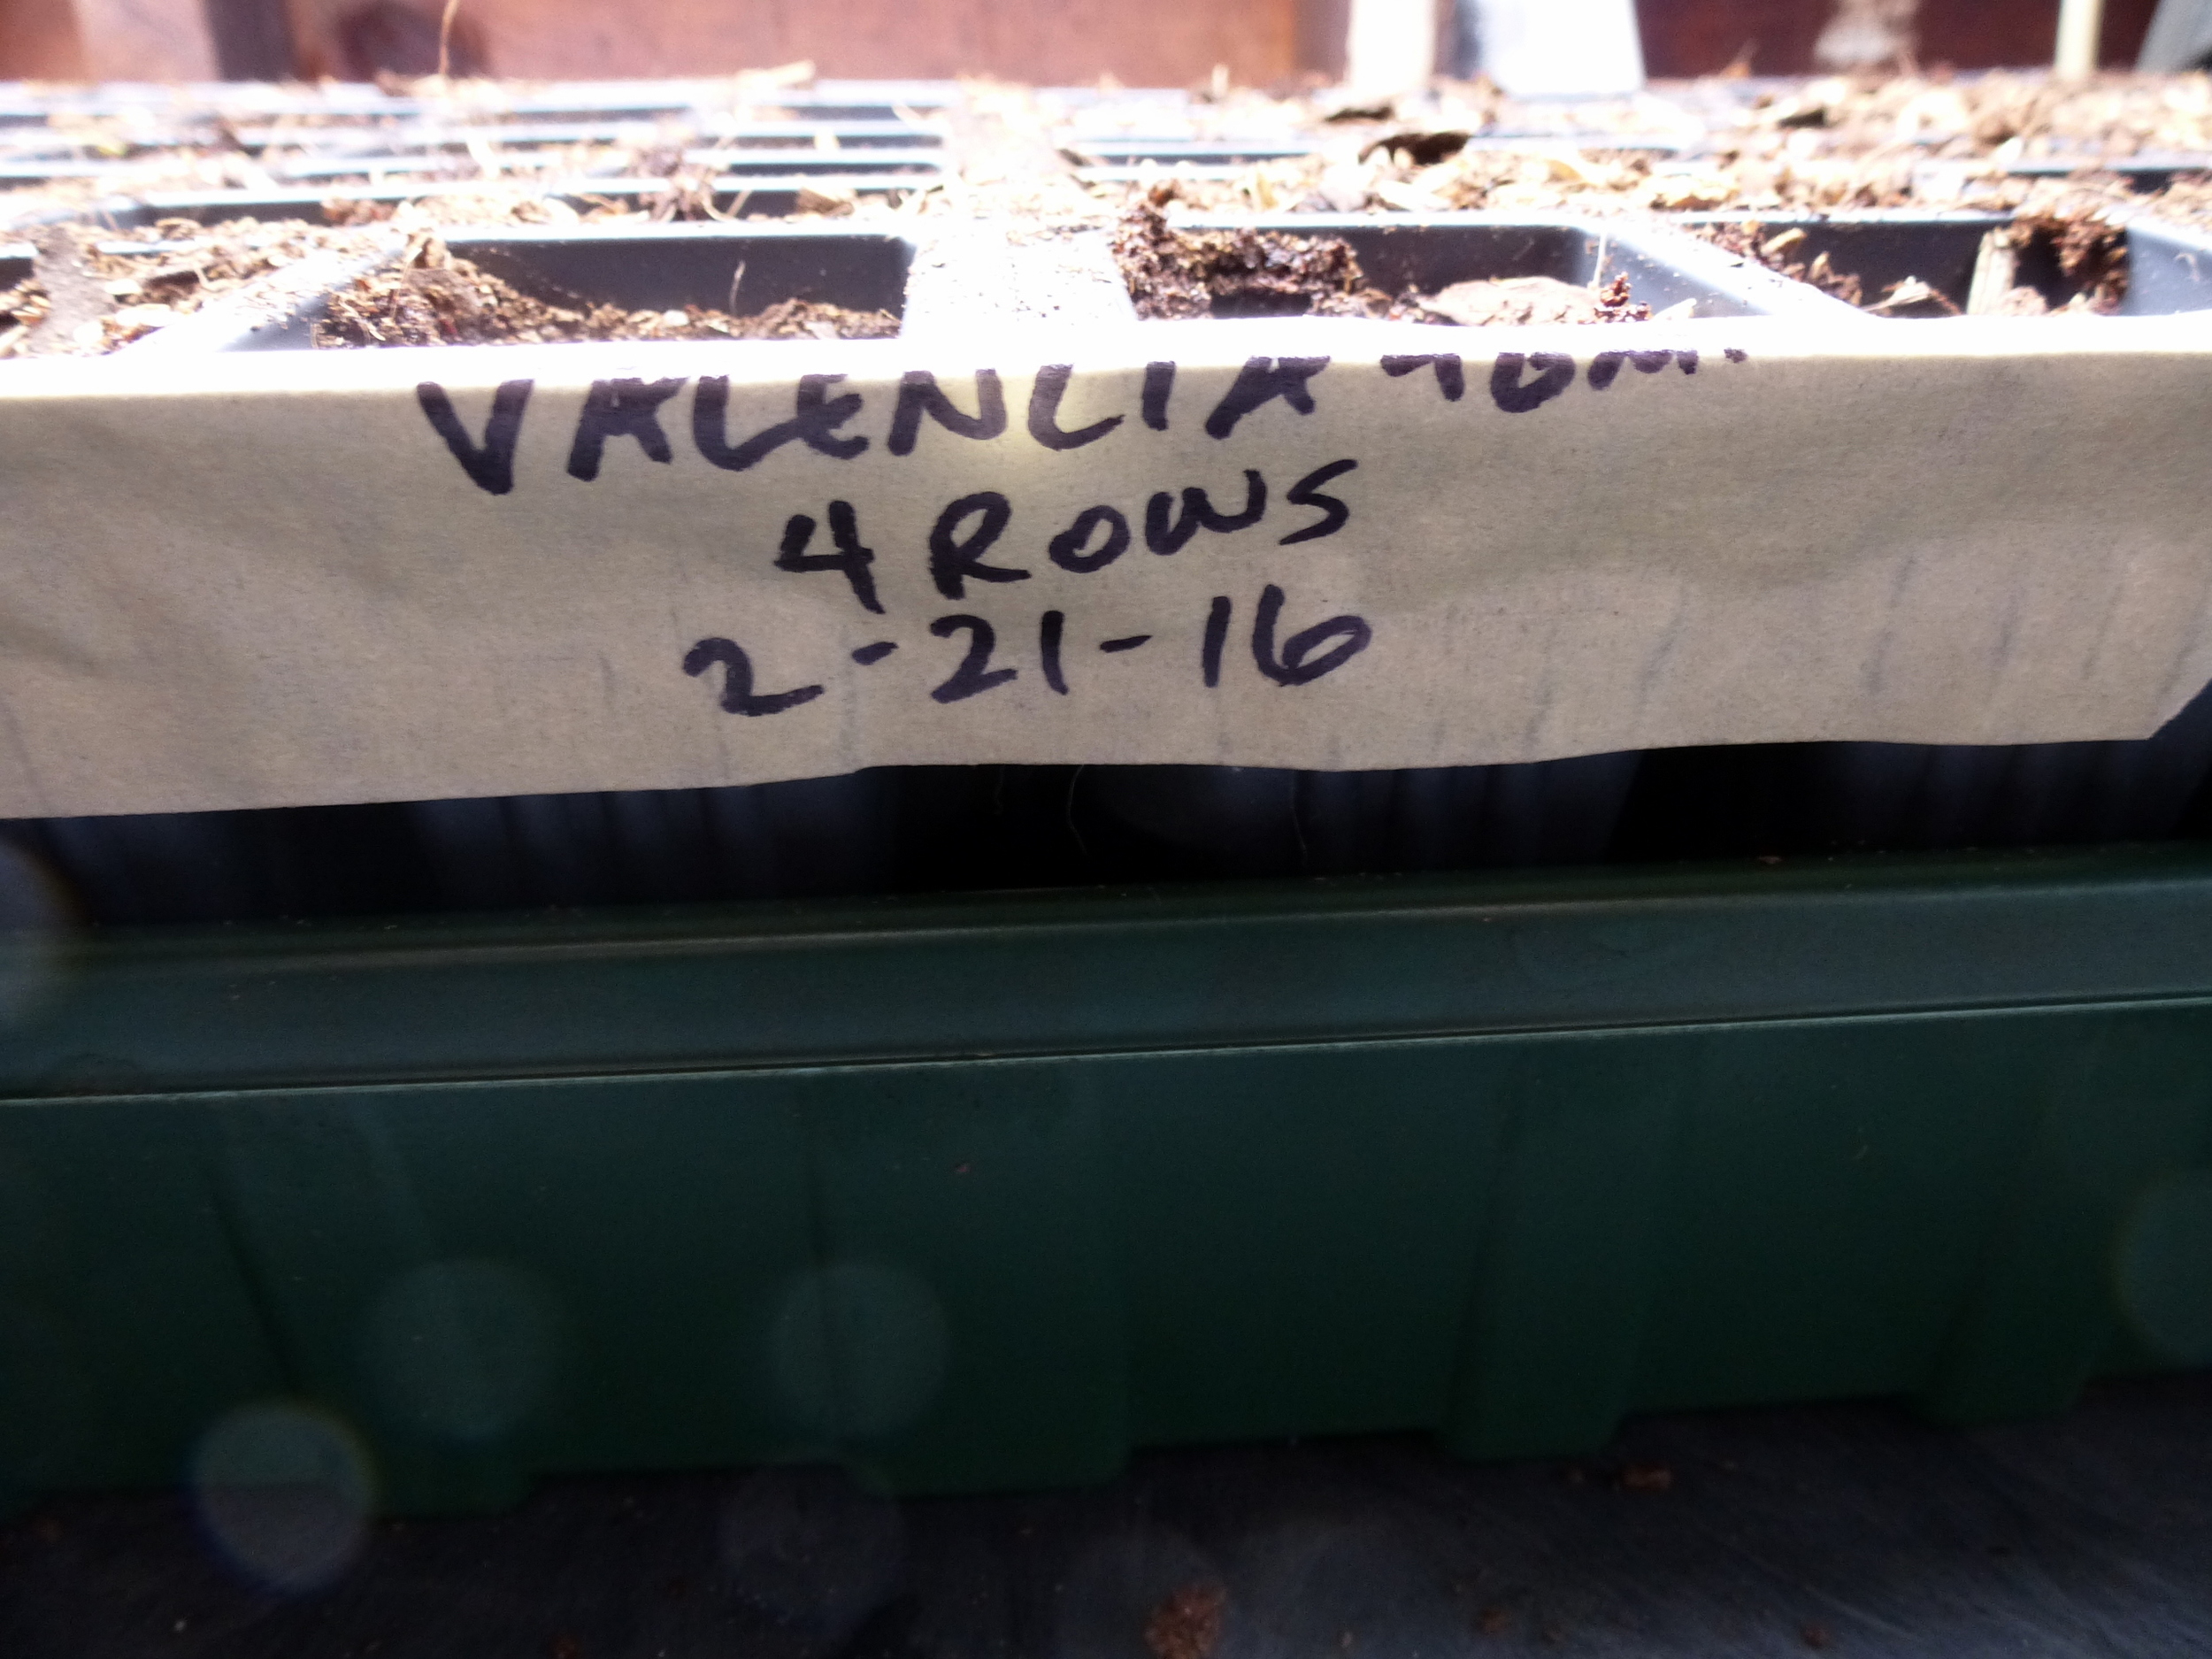
Press the tape against the side of the tray
5. Plug in & Set a Timer

Simple timer can regulate light
I use two surge protectors - one to plug in the lights and one to plug in the mats. The reason for this is that I keep the heat mats on all the time, while the light is put on a timer. A normal timer like this one is fine. I have the same setting every day, so it's easy to just set one setting and be done with it. I put mine on at 4am and off at 8pm. As we get closer to bringing them out and hardening them off later before transplanting them (more on that in a future post), I may reduce that time to get it used to normal daylight hours.

Spray water on cells if needed for moisture
Before you walk away from this wonderful project, be sure there's enough moisture in each cell and the watering trays. I like to have a squirt bottle on hand to spray water before I put the dome on.
So, what happens next? Keep monitoring to be sure your light is on when it should be and the water level/moisture is adequate. Use the guide on your seed packets to determine what to expect from germination timing.
TIP: Once your seedlings have emerged from the soil and are starting to form nicely, you can keep the dome off and let them take in light directly from the grow lights.
I'll be sure to post more along the way on how the seedlings are progressing. Let me know how your seeds are doing in the comments!

